
mosaic 2
PLANNING
Once you have some basic design ideas you need to prepare your design for creation in mosaic.
Often, you will have to draw out your design in sketch form and then resize it to the size of your base.
FIRST DECISIONS
At this point you will need to make some basic decisions.
- will your base be thick card, hard board or wood, a concrete slab?
- is it for internal or external display?
- what shape will it be?
- what sort of border might it have?
- will you work directly or indirectly
- will you work in cut mosaic tiles or use a reclaimed material like broken pottery or shells?
DIRECT AND INDIRECT MOSAIC
- DIRECT MOSAIC is created directly onto its base. You draw the design onto the base, then glue the cut tiles onto the base and then grout.
- INDIRECT MOSAIC is a more complex working method. You create a mirror image of the design on brown paper and then stick the cut tiles to the paper. This has to be pre-grouted and then flipped and concreted onto its base or site. It has the advantage of enabling you to work inside even when creating a piece for outside.
You will find many other mosaic websites describe these basic methodologies in more detail. There are also some good books available to get you started.
At this point you might need to go shopping to the local DIY store for some wood or a slab or search your shed or cellar for what you might have already.
I like to put my mosaics outside so I tend to buy a one metre slab and work indirectly. The result can be propped up, inset or used flat. It saves being brave enough to concrete your work into a fixed location.
For a first project why not buy a piece of hard board (about 80 mm thick) and cut to the size you fancy and work to that? Try the direct method first until you are more experienced.
TILES, COLOURS AND BORDERS FOR ROMAN MOSAIC
On this site, I am concerned with Romanesque projects. You can use all sorts of materials for mosaic but to achieve a classic effect you are typically going to need to work with either reclaimed pottery or bought tiles in ceramic. Mosaic artists also commonly work in the more brightly coloured glass tiles or smalti which were used in Byzantine churches.
Balti is more expensive, irregular and harder to cut and work with. Ceramic is the easier and more readily available choice. Look on the Internet for suppliers of mosaic ceramic tiles (tesserae). In the UK my favourite supplier is The Mosaic Shop in Bath. Tel number 01225 463073
It can be difficult to get the subtler colours which give a classical appearance to your work. Shades of pink, brown, terracotta, yellow and green can be overly garish when chosen from a selection created for bathroom decoration. It is worth putting in some work to get the colours right. At first, such shades can seem dull next to the bright glass alternative. Yes, you do need to create colour contrast in your work but, ceramic, in my view, results in work with a lasting classical beauty.
When it comes to border design, I am quite simply going to refer you to the expert! There is a perfect little booklet called Geometric Patterns from Roman Mosaics and how to draw them by Robert Field. ISBN number 0-906212-63-4 It will tell you everything you need to know and is a great source of inspiration. What you do need to remember is that the Romans were working on a much larger scale so keep it simple and balance the border design with the centre.
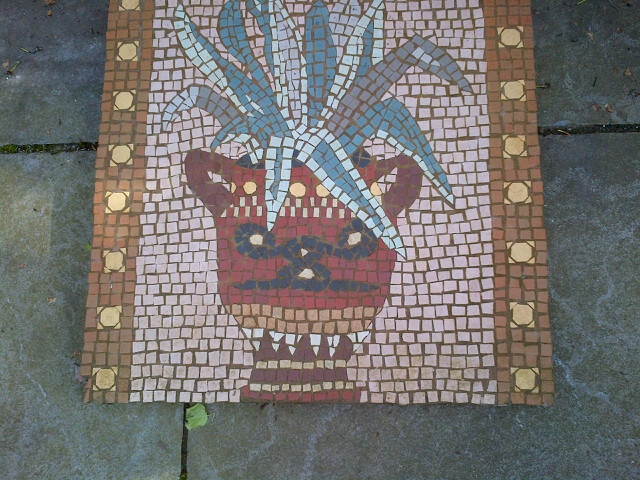
This design is well-balanced by its simple border.
CREATING A PLANNING SHEET
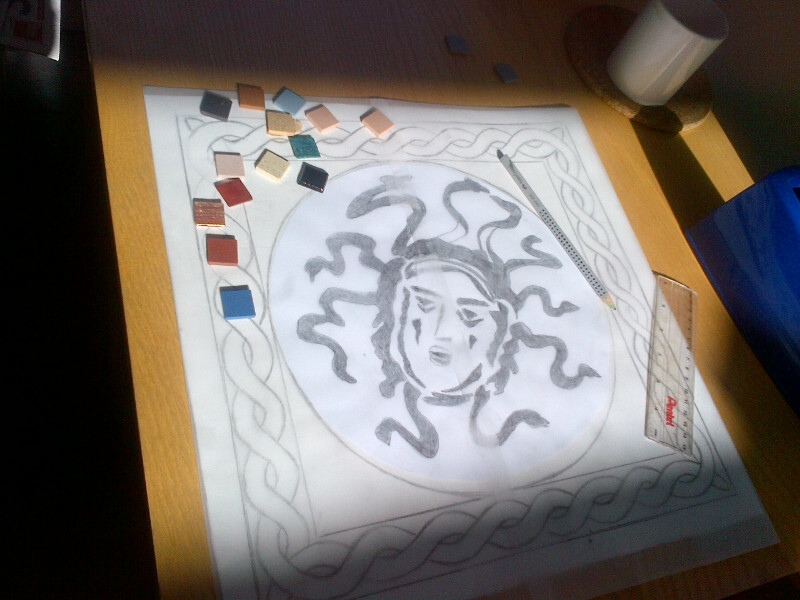
As in the photo at the top of this page, I like to produce a planning sheet by drawing the design complete with border to size ( it can be on one inch squared paper) and planning my tile colours.
You will ideally need
- a3 sized tracing paper
- a3 sized paper ruled with one inch squares
- a ruler and pencil
Draw round your actual base and take the outer line in by 2mm to make sure you can’t work over size.
Draw out your border.
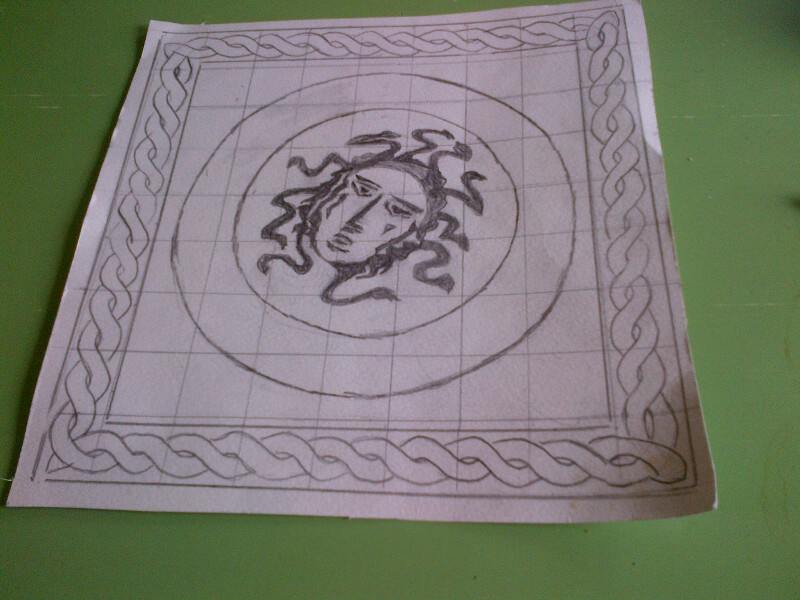
If your drawing design is too small like this one then section it into a grid and carefully redraw it to the larger scale, within your outline and border, or use a photocopier to size it up.
Now continue to MAKE A ROMAN MOSAIC 3 from the front page.
